Release Notes
Getting started
DE-CIX Access
Overview and technical specifications
Create a new Access or LAG
Monitor your Access
Delete your Access
GlobePEER
Overview GlobePEER
Create your GlobePEER service
Manage your GlobePEER service
Delete your GlobePEER service
Blackholing Services
Route Service
Route Server Guides
DE-CIX ASEAN GlobePEER Route Server Guide
DE-CIX Barcelona GlobePEER Route Server Guide
DE-CIX Chicago GlobePEER Route Server Guide
DE-CIX Copenhagen GlobePEER Route Server Guide
DE-CIX Dallas GlobePEER Route Server Guide
DE-CIX Dusseldorf GlobePEER Route Server Guide
DE-CIX Esbjerg GlobePEER Route Server Guide
DE-CIX Frankfurt GlobePEER Route Server Guide
DE-CIX Hamburg GlobePEER Route Server Guide
DE-CIX Helsinki GlobePEER Route Server Guide
DE-CIX Houston GlobePEER Route Server Guide
DE-CIX Istanbul GlobePEER Route Server Guide
DE-CIX Jakarta GlobePEER Route Server Guide
DE-CIX Kristiansand GlobePEER Route Server Guide
DE-CIX Kuala Lumpur GlobePEER Route Server Guide
DE-CIX Leipzig GlobePEER Route Server Guide
DE-CIX Lisbon GlobePEER Route Server Guide
DE-CIX Madrid GlobePEER Route Server Guide
DE-CIX Malaysia GlobePEER Route Server Guide
DE-CIX Marseille GlobePEER Route Server Guide
DE-CIX Mexico GlobePEER Route Server Guide
DE-CIX Munich GlobePEER Route Server Guide
DE-CIX New York GlobePEER Route Server Guide
DE-CIX Oslo GlobePEER Route Server Guide
DE-CIX Palermo GlobePEER Route Server Guide
DE-CIX Phoenix GlobePEER Route Server Guide
DE-CIX Richmond GlobePEER Route Server Guide
DE-CIX Rio De Janeiro GlobePEER Route Server Guide
DE-CIX Sao Paulo GlobePEER Route Server Guide
ACIX GlobePEER Route Server Guide
AF-CIX GlobePEER Route Server Guide
AqabaIX GlobePEER Route Server Guide
Borneo-IX GlobePEER Route Server Guide
Doha IX Route Server Guide
IRAQ-IXP Route Server Guide
Penang IX Route Server Guide
PIE Karachi GlobePEER Route Server Guide
Ruhr-CIX GlobePEER Route Server Guide
SEECIX GlobePEER Route Server Guide
UAE-IX GlobePEER Route Server Guide
SH-IX Dubai Route Server Guide
DE-CIX Stockholm GlobePEER Route Server Guide
SH-IX Fujairah Route Server Guide
Action BGP Communities (Route Server Control)
DE-CIX GlobePEER Route Server Action BGP Communities
ACIX GlobePEER Route Server Action BGP Communities
AF-CIX GlobePEER Route Server Action BGP Communities
AqabaIX GlobePEER Route Server Action BGP Communities
Borneo-IX GlobePEER Route Server Action BGP Communities
IRAQ-IXP Route Server Action BGP Communities
PIE Karachi GlobePEER Route Server Action BGP Communities
Ruhr-CIX GlobePEER Route Server Action BGP Communities
SEECIX GlobePEER Route Server Action BGP Communities
UAE-IX GlobePEER Route Server Action BGP Communities
Doha IX Route Server Action BGP Communities
SH-IX Fujairah Route Server Action BGP Communities
SH-IX Dubai Route Server Action BGP Communities
Informational BGP Communities (Route Details)
DE-CIX GlobePEER Route Server Informational BGP Communities
ACIX GlobePEER Route Server Informational BGP Communities
AF-CIX GlobePEER Route Server Informational BGP Communities
AqabaIX GlobePEEER Route Server Informational BGP Communities
Borneo-IX GlobePEER Route Server Informational BGP Communities
IRAQ-IXP Route Server Informational BGP Communities
PIE Karachi GlobePEER Route Server Informational BGP Communities
Ruhr-CIX GlobePEER Route Server Informational BGP Communities
SEECIX GlobePEER Route Server Informational BGP Communities
UAE-IX GlobePEER Route Server Informational BGP Communities
SH-IX Dubai Route Server Informational BGP Communities
SH-IX Fujairah Route Server Informational BGP Communities
Doha IX Route Server Informational BGP Communities
Looking Glass Guides
DE-CIX GlobePEER Looking Glass Guide
ACIX GlobePEER Looking Glass Guide
AF-CIX GlobePEER Looking Glass Guide
AqabaIX GlobePEER Looking Glass Guide
Borneo-IX GlobePEER Looking Glass Guide
IRAQ-IXP Looking Glass Guide
PIE Karachi Looking Glass Guide
Ruhr-CIX GlobePEER Looking Glass Guide
SEECIX GlobePEER Looking Glass Guide
UAE-IX GlobePEER Looking Glass Guide
SH-IX Dubai Looking Glass Guide
SH-IX Fujairah Looking Glass Guide
Doha IX Looking Glass Guide
Notes on additional Routes (incl. Google VPP) via GlobePEER Route Service
Closed User Groups
DirectCLOUD
Overview and Monitoring
Cloud Connections
DirectCLOUD for Microsoft Azure
Create DirectCLOUD Connection for Azure
How to order a DirectCLOUD connection for Azure
Create or upgrade Gateways for your Azure ExpressRoute
Manage your Azure Cloud Connection
Upgrade / downgrade a DirectCLOUD service for Azure
Change DirectCLOUD configurations for Azure
Delete DirectCLOUD configurations for Azure
Monitoring Azure ExpressRoute uptime
Monitor your connection
Updating the Cloud Key for Your Azure DirectCLOUD Service
Delete your Azure Cloud connection
FAQ DirectCLOUD for Microsoft Azure
DirectCLOUD for AWS
Create DirectCLOUD connection for AWS
Manage your DirectCLOUD connection for AWS
Upgrade / downgrade the connection
Change DirectCLOUD configurations for AWS
Delete DirectCLOUD configurations for AWS
Monitoring AWS DirectConnect uptime
Monitor your connection
Delete your AWS Cloud connection
DirectCLOUD for IBM
Create DirectCLOUD connection for IBM
Manage your DirectCLOUD connection for IBM
Upgrade / downgrade a DirectCLOUD service for IBM
Change DirectCLOUD configurations for IBM
Delete DirectCLOUD configurations for IBM
Monitor your connection
Delete your IBM Cloud connection
DirectCLOUD for GCloud
Create DirectCLOUD connection for GCloud
Manage your DirectCLOUD connection for GCloud
Upgrade / downgrade the connection
Change DirectCLOUD configurations for GCloud
Delete DirectCLOUD configurations for GCloud
Monitor your connection
Delete your GCloud connection
DirectCLOUD for Oracle
Cloud ROUTER
Overview & use cases
Create / Manage your Cloud ROUTER
Create / Manage the configurations
Add a configuration
Upgrade / downgrade a configuration
Change your Cloud ROUTER configurations
Monitor your configurations
Delete a Cloud ROUTER configuration
Advanced Settings Cloud ROUTER
VirtualPNI
Overview VirtualPNI
Create your VirtualPNI
Order and configure your VirtualPNI between your own resources
Order and configure your VirtualPNI to a third-party provider
Manage your VirtualPNI
Upgrade / Downgrade your VirtualPNI service
Change VirtualPNI configurations
Delete VirtualPNI configurations
Monitor your VirtualPNI
Delete your VirtualPNI service
Colocation
Out-of-band access to your DE-CIX colocated equipment
Shipping Information
Colocation equipment management for Digital Realty data centers
DE-CIX API
Overview DE-CIX API
Quick API Reference
Cloud ROUTER Postman Collection
Monitor and Visibility of Learned Routes and Advertised Routes by API
BGP Ingress and Egress Filters Usage by API
Terraform Provider
Terraform Provider Overview
Getting Started
Provider Configuration
Managing Services
State Management
End-to-End Example
Virtual PNI with a Foreign Port (Terraform)
Service Insights System
Service Insights System - Tutorial
Standard customer Service Insights Tutorial (for customers without reselling services or DaaS location)
Service Telemetry Insights Tutorial
GlobePEER Traffic Insights Tutorial
GlobePEER Threat Insights Tutorial
Cloud ROUTER Traffic Insights Tutorial
Reseller Service Insights Tutorial
Reseller GlobePEER Traffic Insights Tutorial
Reseller GlobePEER Threat Insights Tutorial
Reseller Service Telemetry Insights Tutorial
Partner (DaaS) Service Insights Tutorial
Partner GlobePEER Traffic Insights Tutorial
Partner Service Telemetry Insights Tutorial
Partner GlobePEER Threat Insights Tutorial
Service Insights Tutorial - General Informations
Service Insights System
Account administration
Add new users or subcustomers
Manage user roles and permissions
Multi-Factor-Authentification
Retrieving username and reset password
Delete a user
Customer service and ticket system
Table of Contents
- All Categories
- VirtualPNI
- Manage your VirtualPNI
- Change VirtualPNI configurations
Change VirtualPNI configurations

This article provides guides for changing the technical specifications of your configurations for a VirtualPNI service via our portal — for both Access ↔ Access and Access ↔ Cloud ROUTER connections.
This article does not cover deleting the VirtualPNI service itself. To do that, click here.
Prerequisites
To change the technical specifications of a configuration (e.g., IP address or VLAN), you need a VirtualPNI service in place. To set one up, follow the guide for your case:
- Order and configure your VirtualPNI between your own resources
- Order and configure your VirtualPNI to a third-party provider
Open the service configuration
These steps are the same for both connection types.
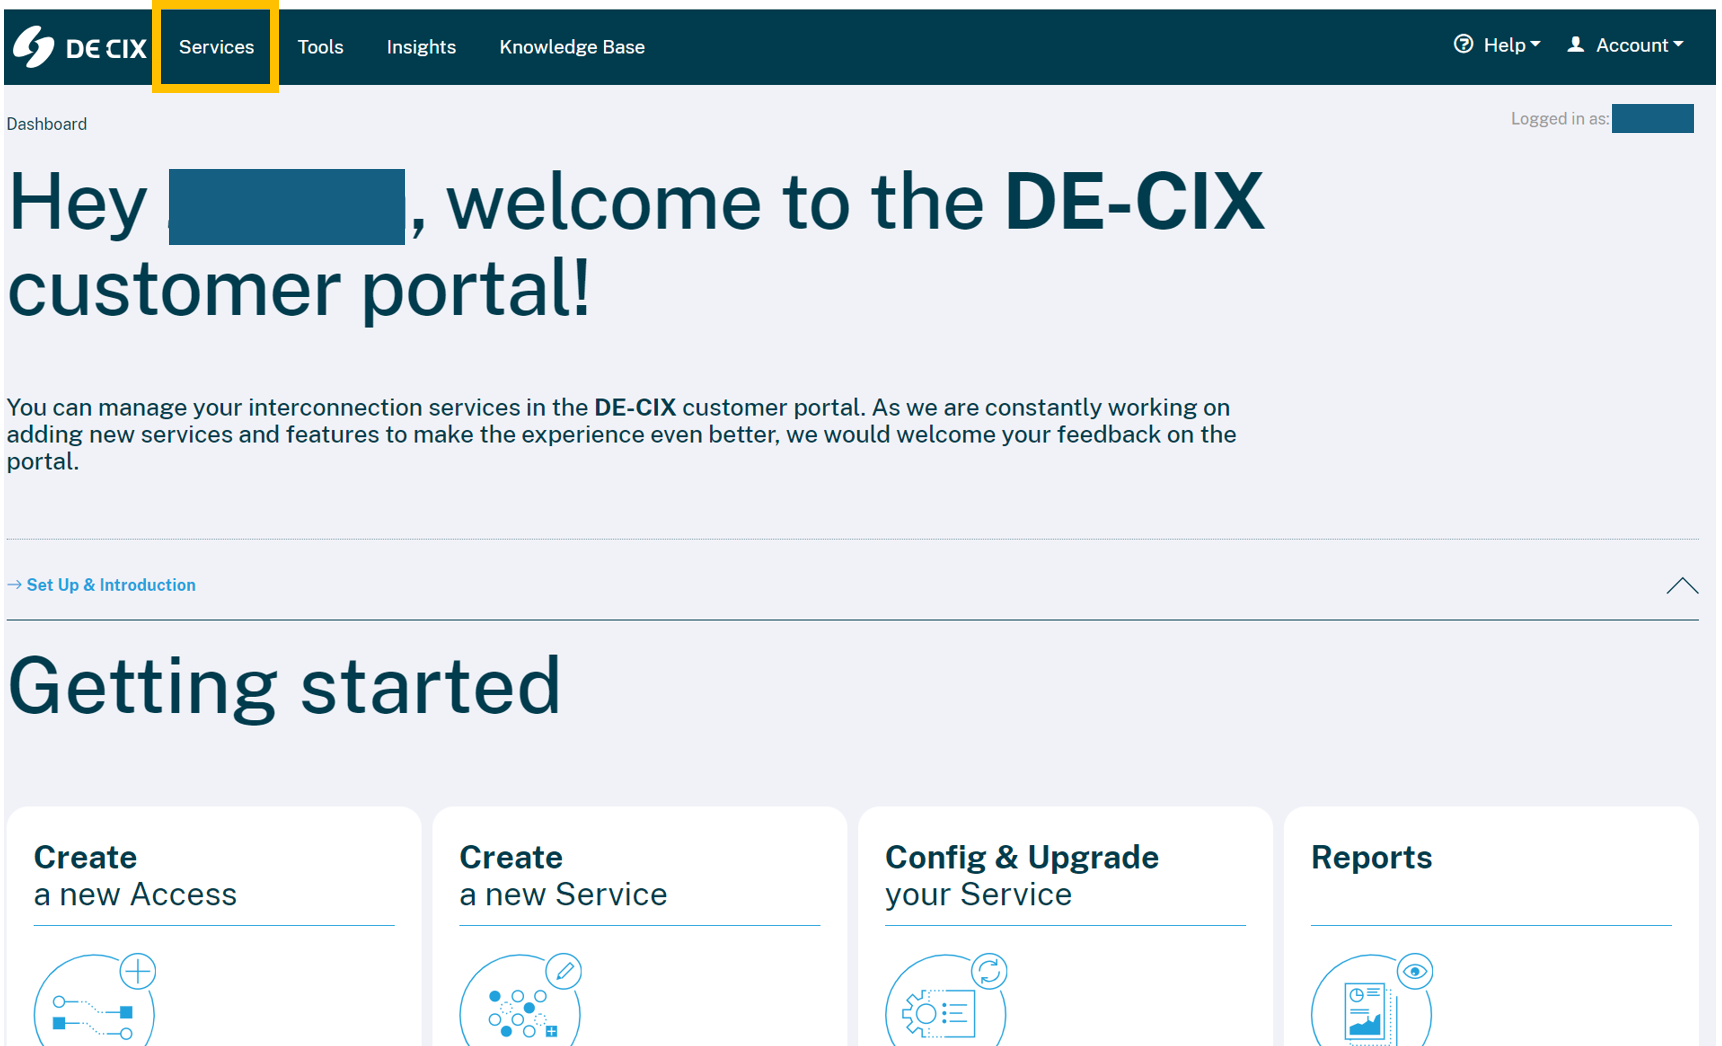
- Log in to our portal and click on the Services tab.
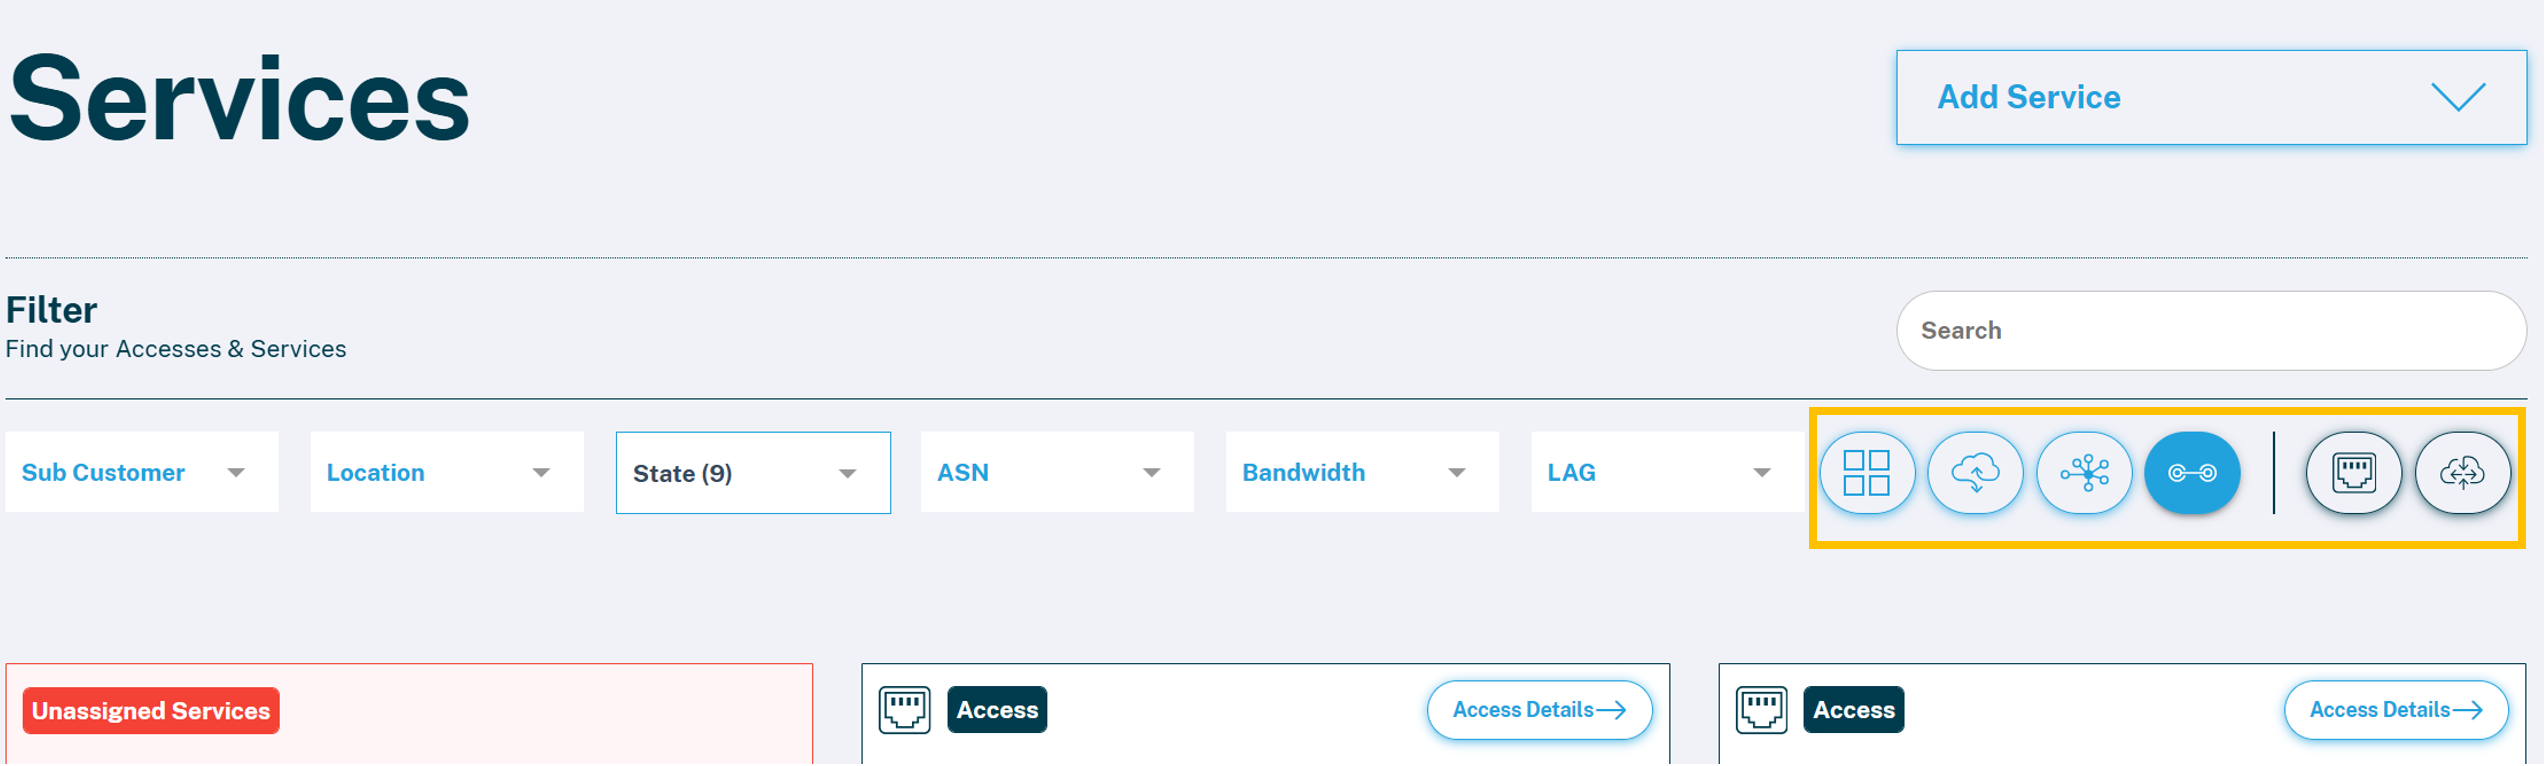
- Locate the service for which you want to change the configuration. Use the filtering option on the right to narrow your search.
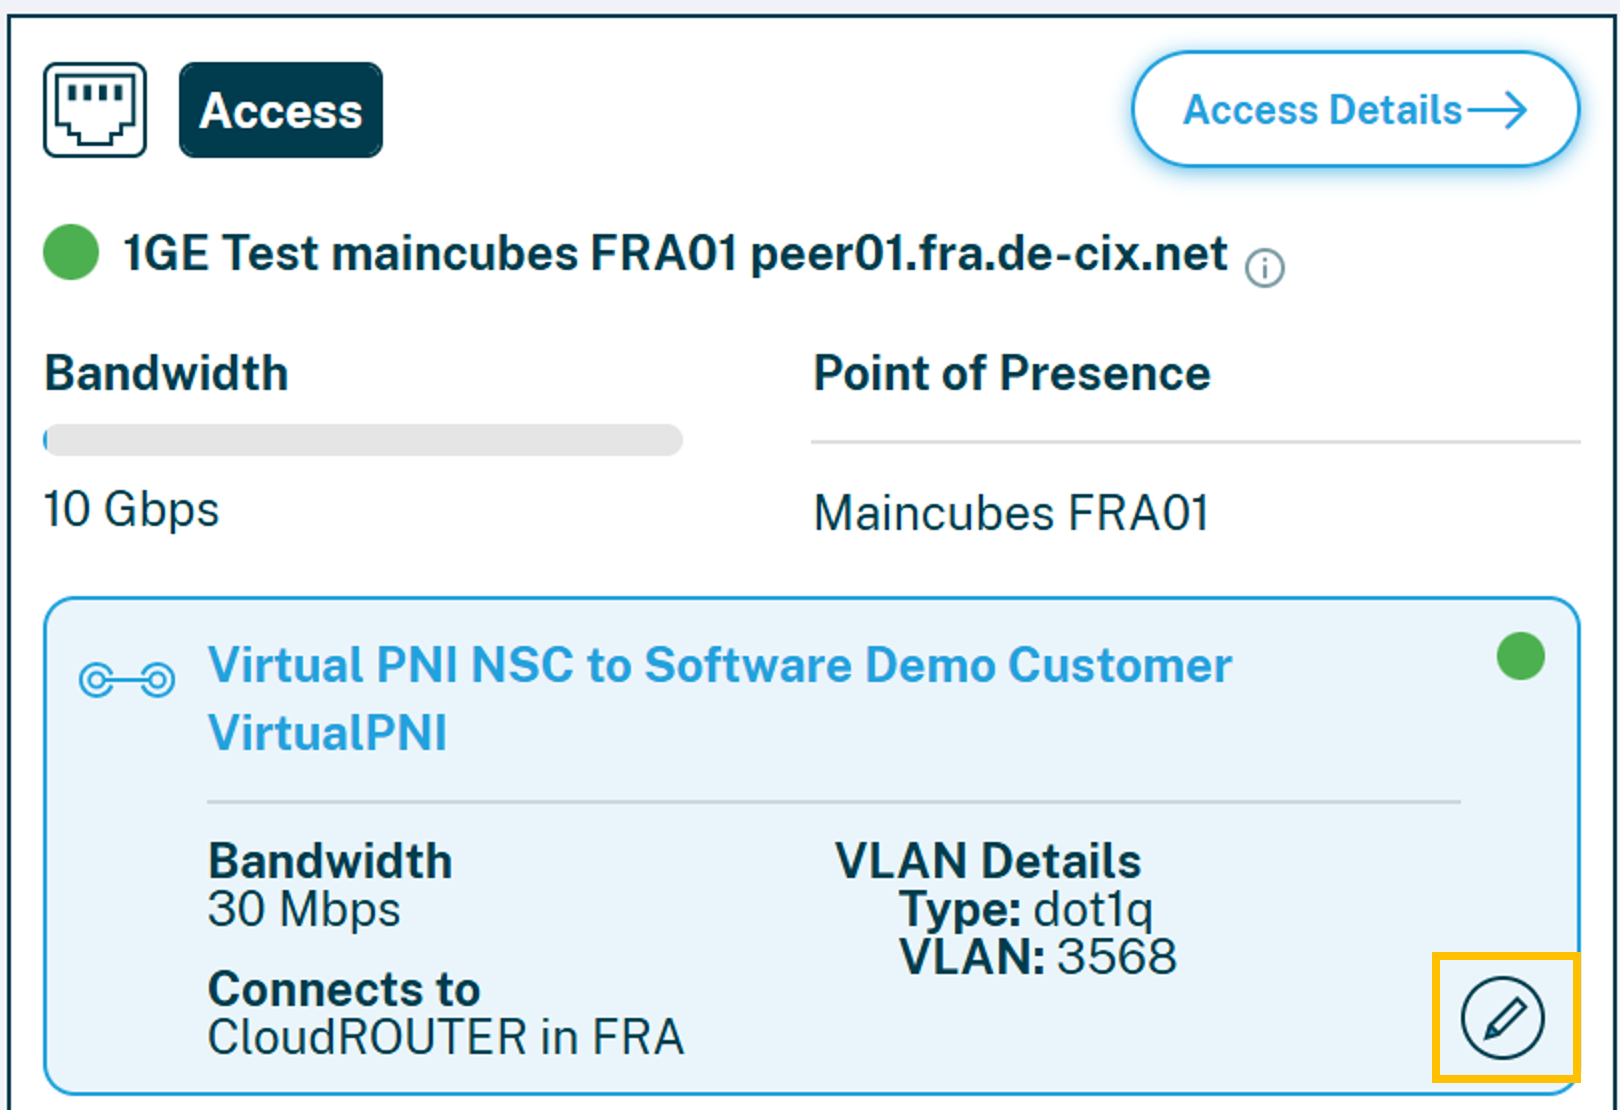
- Click on the pencil button for editing.
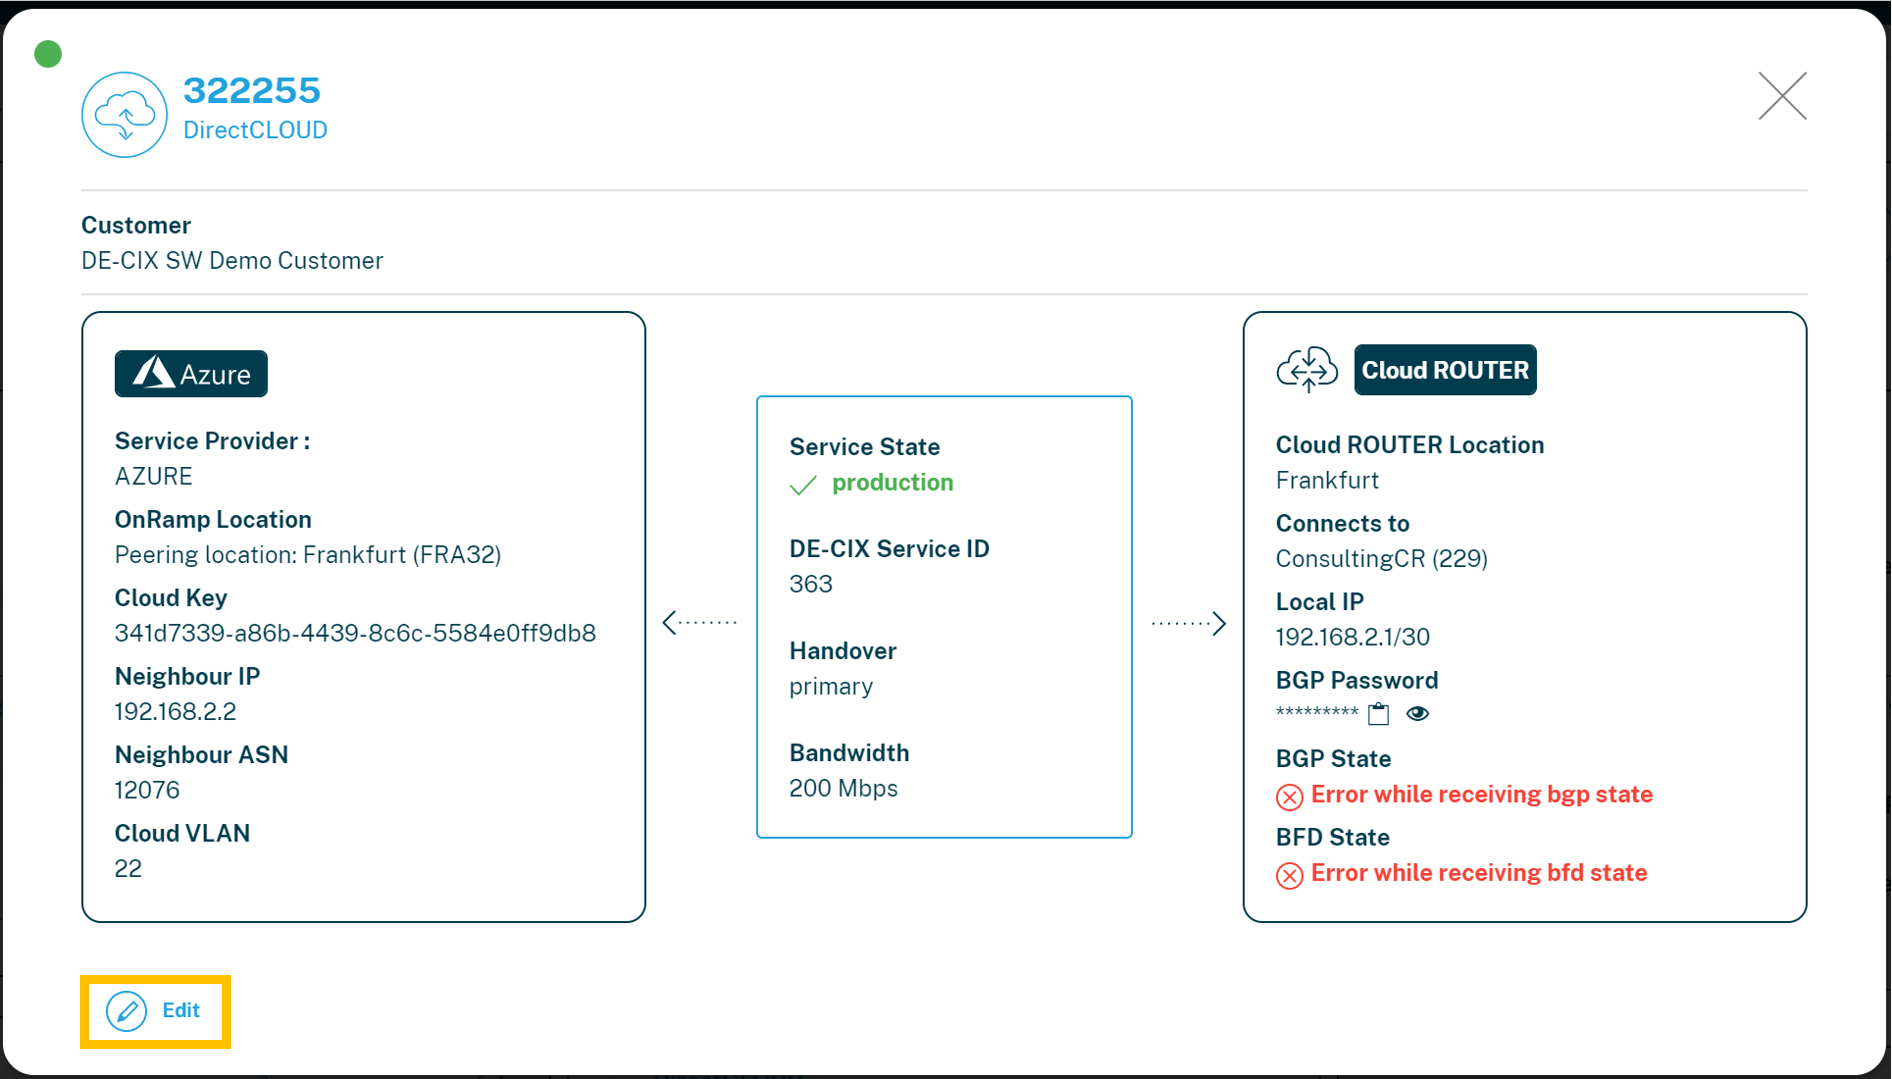
- Click again on Edit.
- Scroll down to the Configuration section, then continue with the section below that matches your connection type.
Change an Access ↔ Access configuration
- On the side you want to change, click Remove A-Side or Remove B-Side.
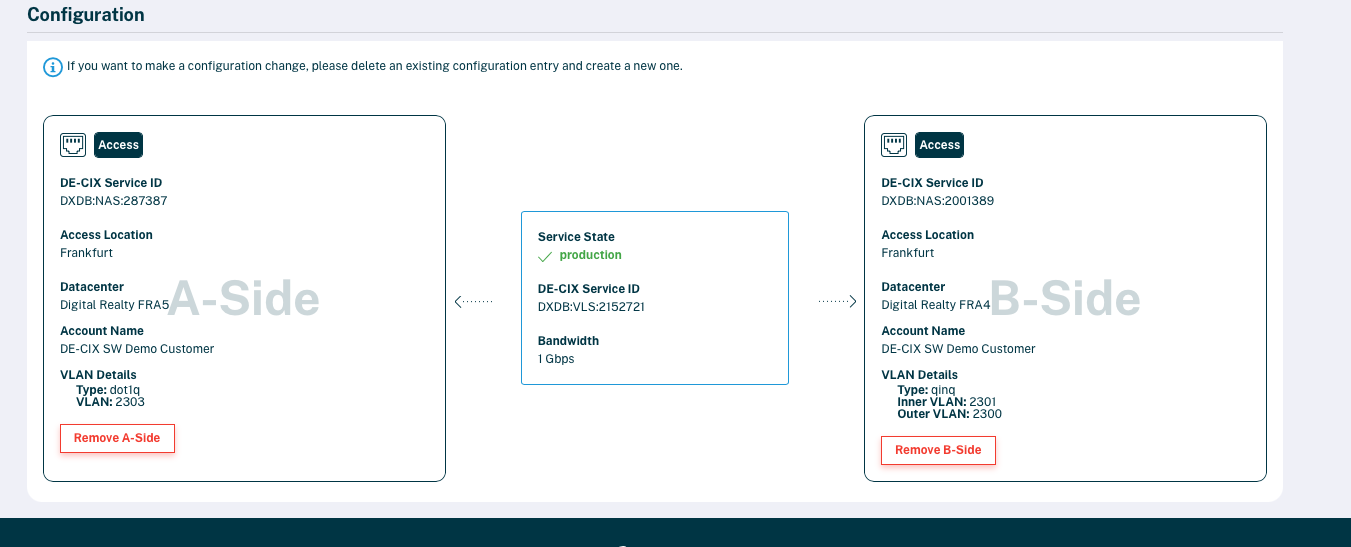
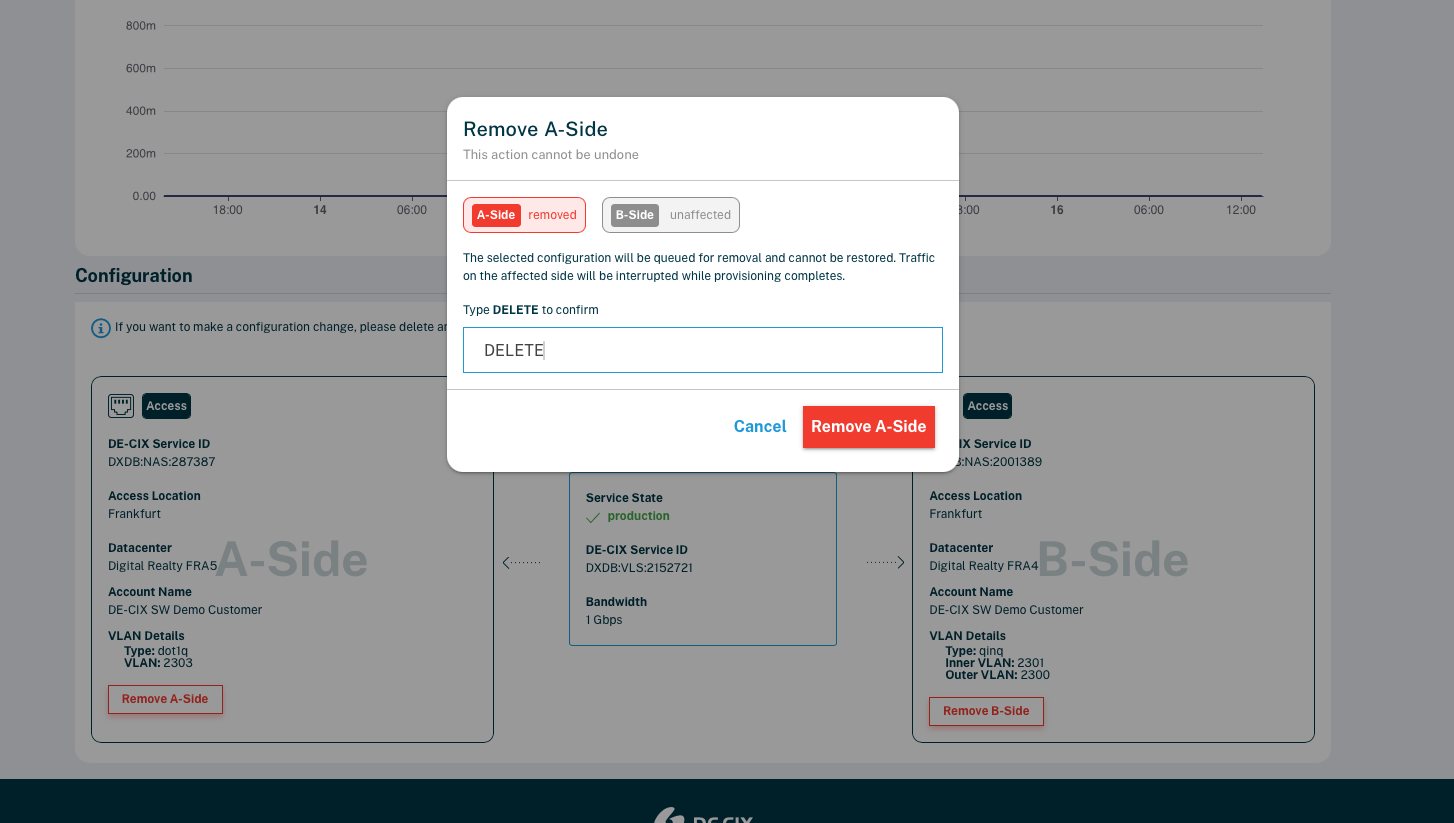
- In the dialog, review the effect — the selected side is removed while the other side stays unaffected. This action cannot be undone.
- Type DELETE to confirm, then click Remove A-Side / Remove B-Side.
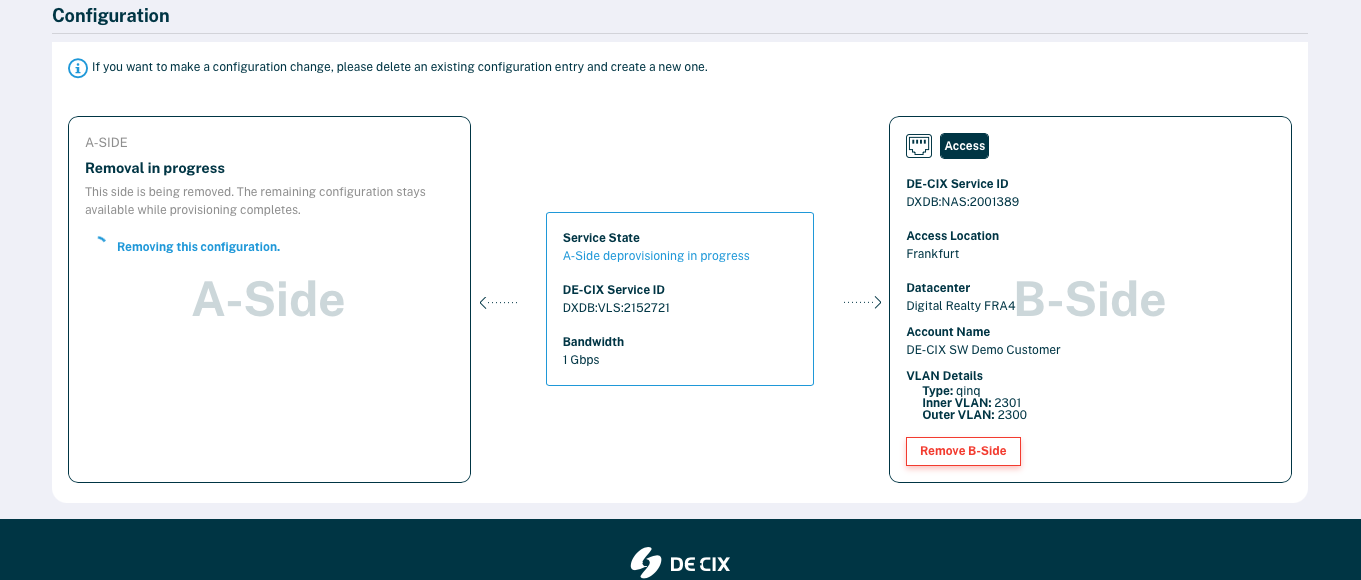
- Wait until the removal completes. The side shows Removal in progress while provisioning finishes.
- On the now-empty side, click Add Configuration.
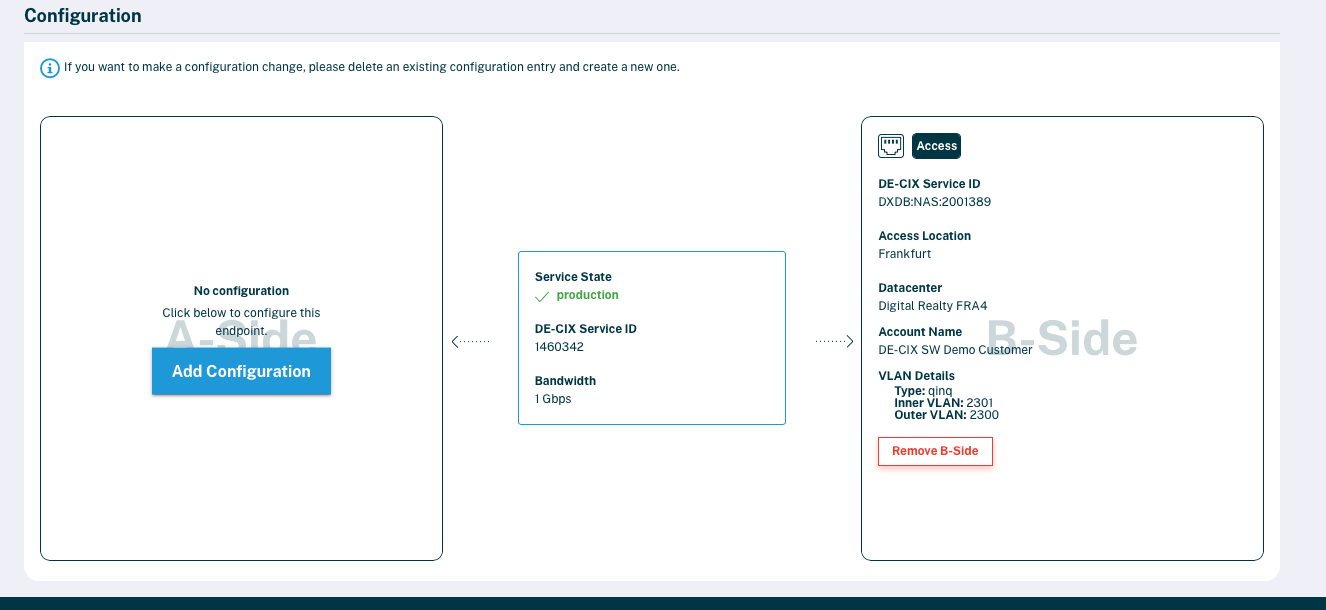
- Specify the following information:
- Access Port — the list only shows ports in that side's metro area.
- Encapsulation — determined by the selected Access port: a Dot1Q-only port applies Dot1Q automatically, a QinQ-capable port lets you choose Dot1Q or QinQ.
- VLAN — for Dot1Q, a single VLAN ID (1–4094); for QinQ, an Inner VLAN ID (C-Tag) and an Outer VLAN ID (S-Tag), each 1–4094.
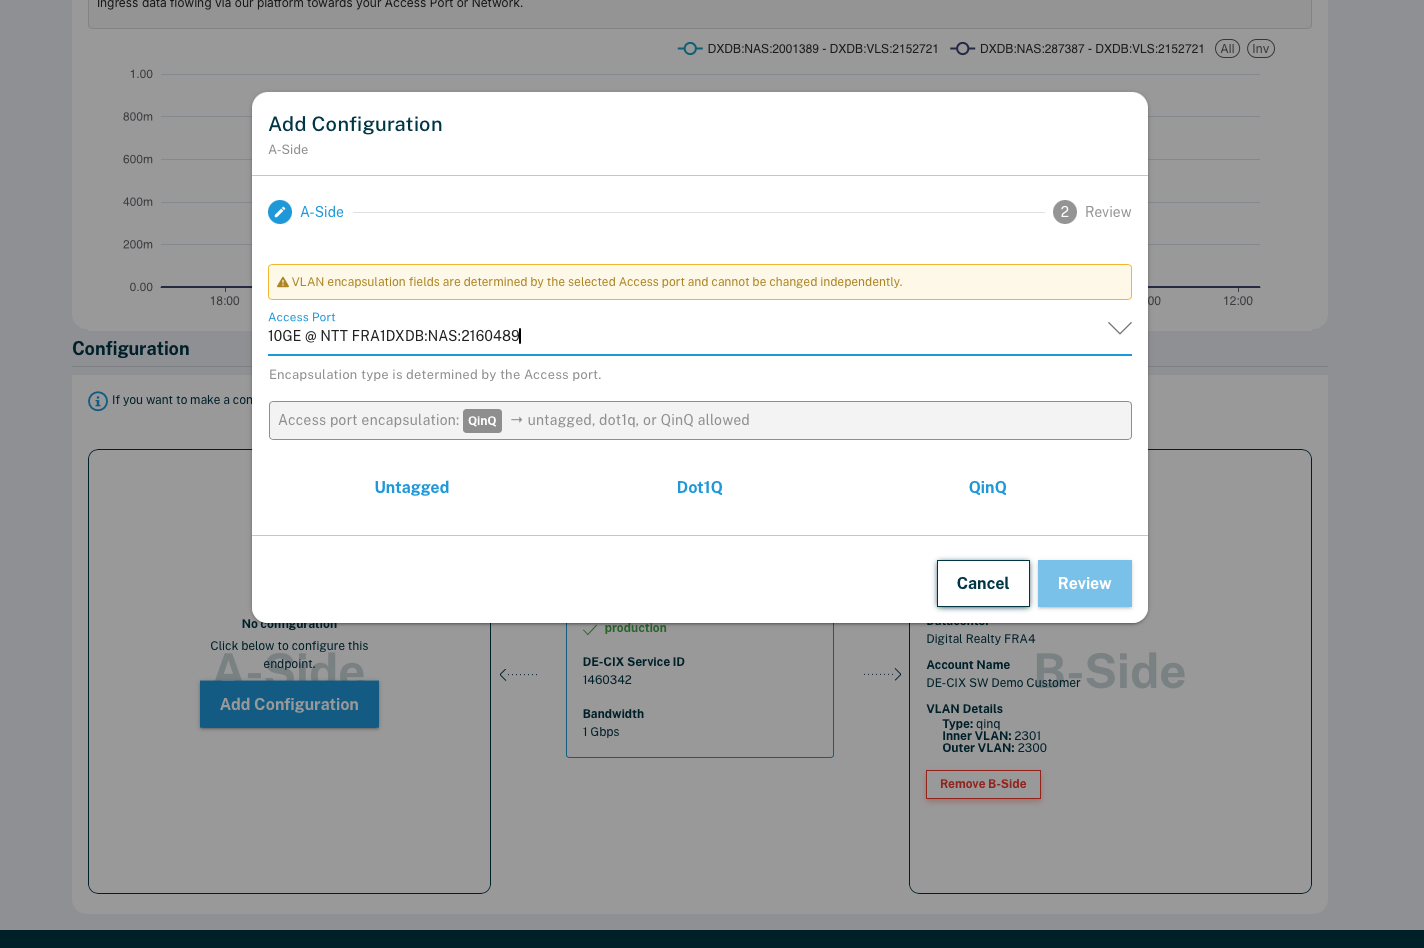
- Click Review, check the details, and confirm.
Change an Access ↔ Cloud ROUTER configuration
For an Access ↔ Cloud ROUTER connection, the Access side and the Cloud ROUTER side form a single configuration entry. To change it, delete the entry and create a new one.
- In the Configuration section, click Delete next to the existing Cloud ROUTER configuration entry, and confirm.
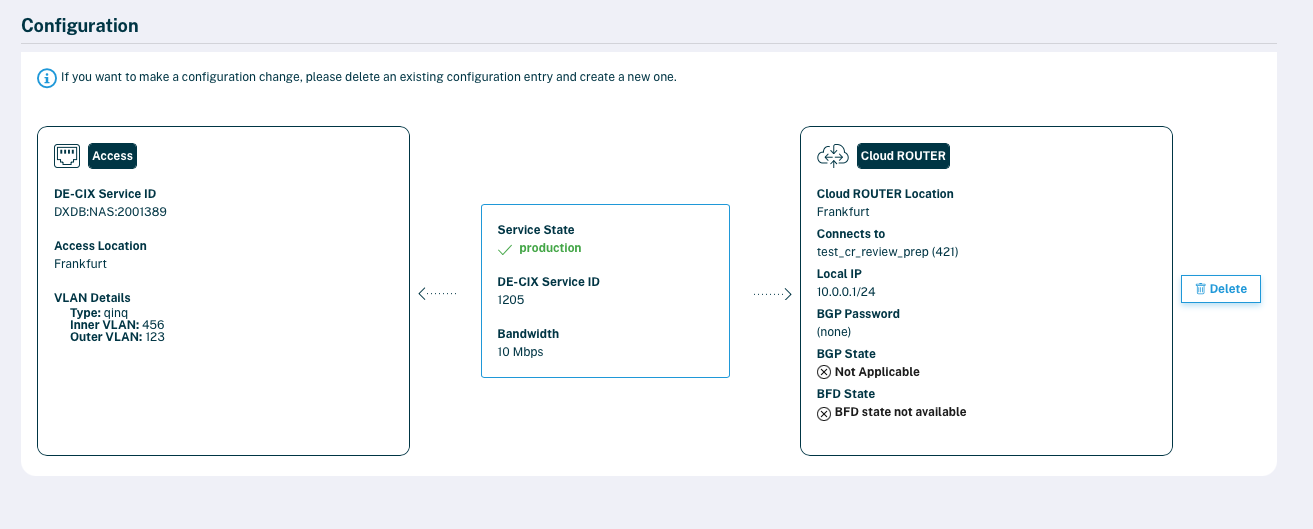
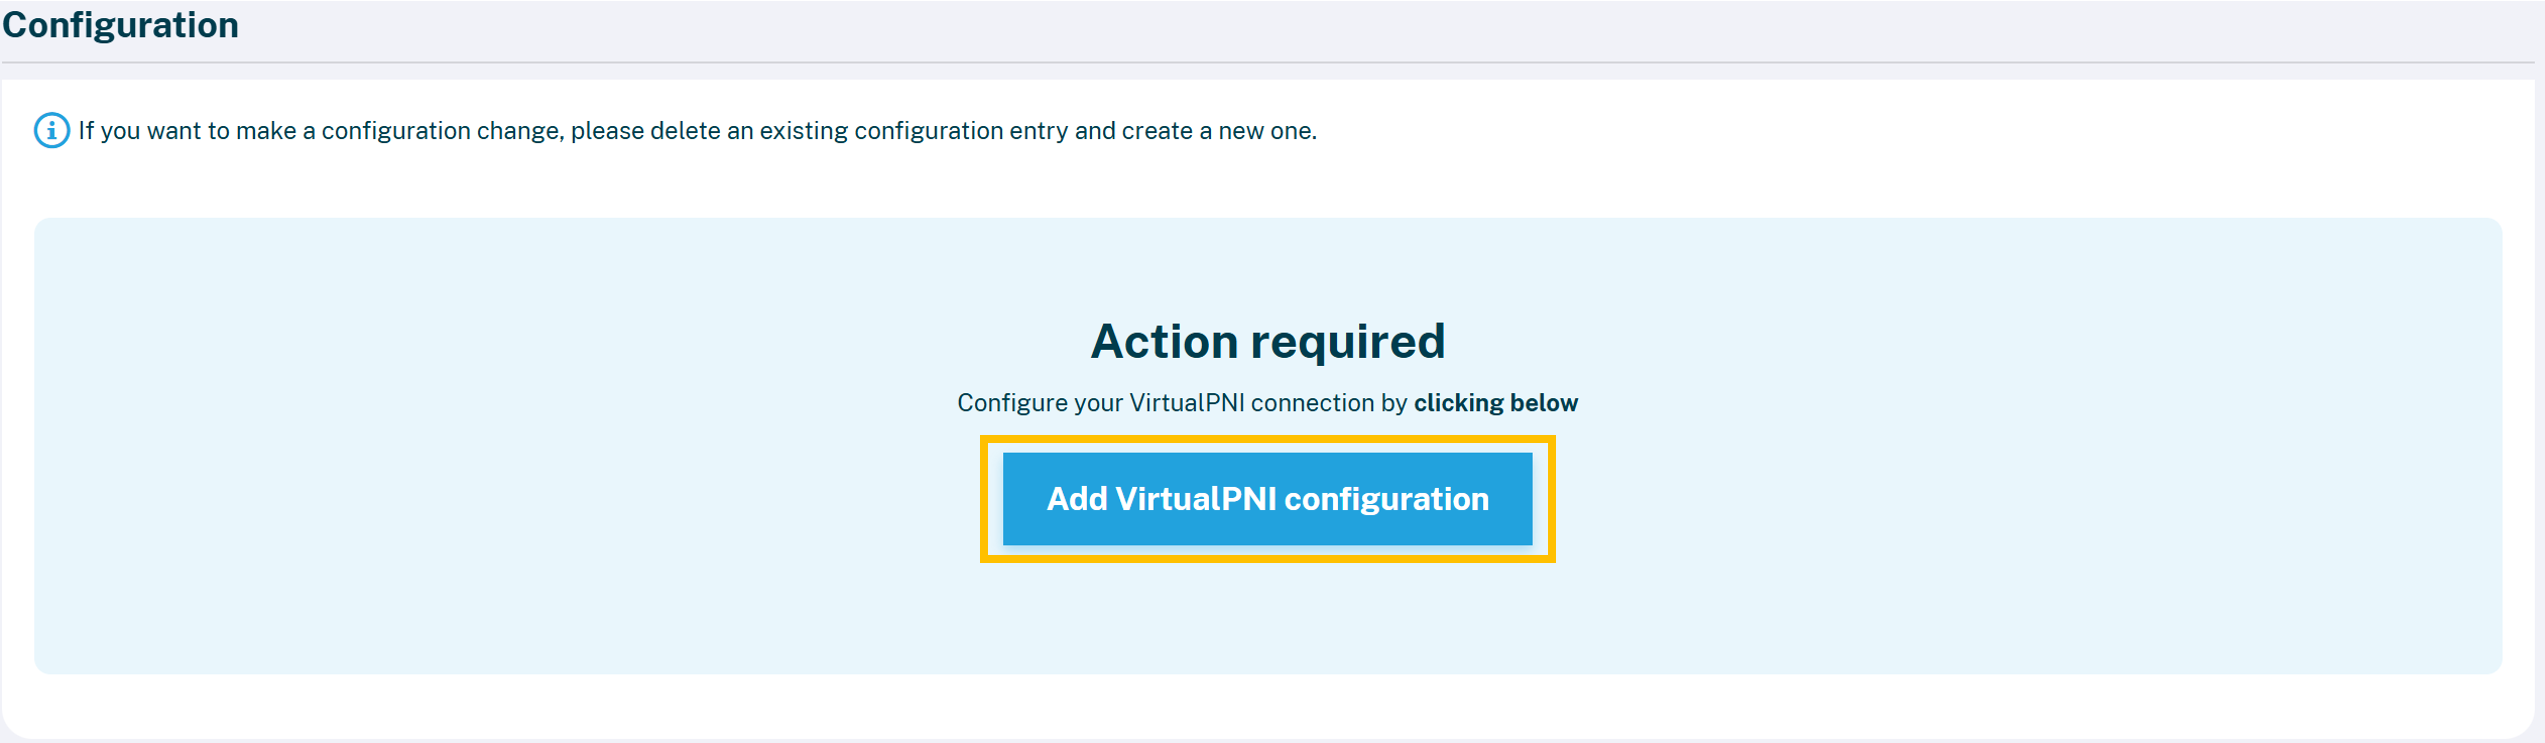
- Click on Add VirtualPNI configuration.
- Configure the new connection
- Specify the following information:
- Your DE-CIX Access
- The VLAN type and the VLAN ID you want to use for connecting to the Cloud ROUTER
- Choose your Cloud Router.
- External Reference: The name for your configuration
- The BGP IP of the Cloud Router with the subnet mask (we recommend using a /30)
- The BGP IP of your on-premises.
- BGP Password (Optional)
- Your BGP AS Number
- Click on Submit.
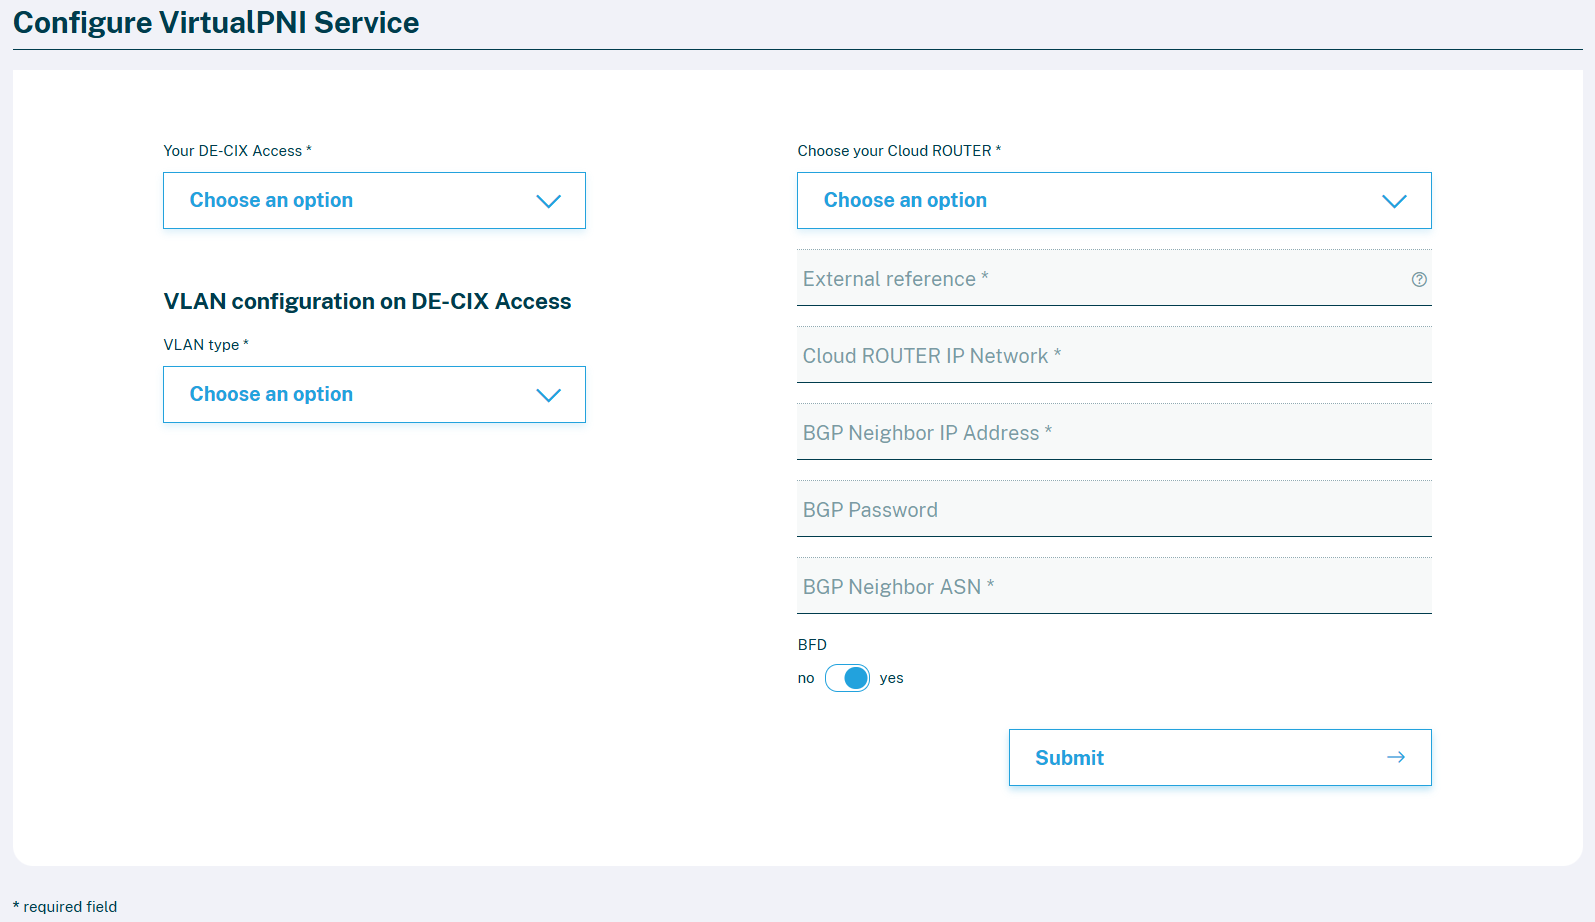 The default setting for BFD (Bidirectional forwarding detection) is "yes". We recommend not changing it, as it improves the stability of your connection.
- Specify the following information:
You successfully changed a VirtualPNI configuration.
Need help? Get in touch with our customer service.
